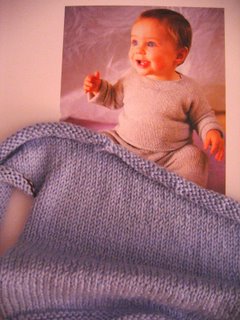
As some of you clever readers noticed in Julian's half-birthday photos, I did finish Julian's Christmas cardi in time! And I did not run out of yarn...in fact, I had 2 and a half yards left! No kidding. That's how close it came ;0)

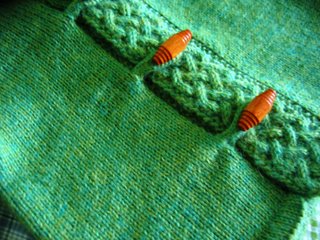
You may notice that it looks very similar to Kate Gilbert's A cardigan for Arwen from the Winter 2006 issue of Interweave Knits magazine . That's because it was heavily inspired by it and sports Kate's cable along both sides and the hood. This one though is sized for a tiny tot, has a basic raglan and hood construction which is different from Kate's version, has simple hemmed sleeve cuffs and has toggle button closures.

I call this version A cardigan for Merry because in this smaller size and happy green colour I thought it more hobbit-y than elfish. I would have named it after Frodo, but thought Merry was more festive considering I knit it as a Christmas sweater ;0)
Here's my adaptation for anyone interested. You will need to refer to the magazine for Kate's cable charts though as these are original to Kate's design and rightfully copyrighted (I hope). (Note: Kate's original pattern complete with the cable charts is now available as an instant download from her site here).
Here goes...
Size
12-18 months, 24 inch chest, 11 inch length
Materials
3 mm needles, a cable needle, small double pointed needles for I-cord button loops (I used size 0 sock needles), and 6 balls (if you are lucky and really good at yarn economy) or 7 to be safe of Knit Picks Andean Treasure or any other yarn that gives you the proper gauge.
Gauge
26 stitches to 10 cm (4") in stocking stitch using 3mm needles
Pattern notes
It will be easier to sew the shoulder seams if you remember to knit all raglan decreases on the sleeves, back and fronts 3 stitches in from the edge rather than on the first stitch ;0)
Back
- Cast-on 79 stitches and work 4 rows in stocking stitch (knit on right side rows, purl on wrong side rows).
- Work a breaking row by knitting one row on the wrong side and continue in stocking stitch for 4 more rows. On the next row (which should be a right side row) fold the hem by knitting together the first stitch on your left hand needle together with the first stitch of your cast on row. Continue like this to the end of the row. Of course, if you prefer, you can always just sew the hem closed when you are done.
- Continue in stocking stitch until the back measures 8 inches from the breaking row.
- Armhole shaping: cast-off 4 stitches at beginning of next 2 rows (71 stitches).
- Raglan shaping: decrease 1 stitch at beginning and end of every 3rd row 12 times, then dec 1 st at armhole end(s) of every 2nd row 3 times. (41 stitches).
- Place remaining 41 stitches on a holder or piece of yarn to be worked later for the hood.

Front
- Beginning with cardigan right side first, cast on 33 stitches and work 4 rows in stocking stitch.
- Work a breaking row by knitting one row on the wrong side.
- At the beginning of next row (right side), cast on 24 stitches for the right cable and knit across these 24 stitches, place a marker, and knit across the remaining 33 stitches. These 33 stitches will continue to be worked in stocking stitch while the 24 edge stitches should be worked using the right cable chart from Kate Gilbert's original pattern, A Cardigan for Arwen, published in the Winter 2006 issue of Interweave Knits magazine. Note that you can substitute another cable if you prefer -- it will need to measure 2 inches in width though to work with the rest of the pattern.
- Remember to fold and knit the hem on the 33 original stitches once you have worked 4 rows (unless you decide to sew the hem closed later in which case just carry on ;0).
- Continue in pattern until piece measures 8 inches from the breaking row.
- Armhole shaping: Cast-off 4 stitches at beginning of next wrong side row (29 stocking stitch stitches + 24 cable stitches).
- Raglan shaping: decrease one stitch at armhole side at every 3rd row 12 times (17 stocking stitches + 24 cable stitches remaining). Then decrease 1 stitch at armhole every second row three times (14 sts + 24 cable sts remaining).
- Place remaining stitches on a holder or piece of yarn to be worked later for the hood.
- Left cardigan front: work as for right side, using the left cable chart and reversing armhole and raglan shapings.

Sleeves
- Cast on 45 stitches and work hem as for back.
- Continue in stocking stitch increasing 1 stitch at beginning and end of every 5th row, 5 times (55 stitches)
- Work even until sleeve measures 8 inches from breaking row.
- Shape cap: Cast off 4 stitches at beginning of next 2 rows (47 stitches remain).
- Raglan shaping: Decrease 1 stitch at beginning and end of every 2nd row, 20 times, then decrease 1 stitch at each end of every row twice.
- Cast-off remaining 3 stitches.
- Knit the 2nd sleeve.

Shoulder seams
- Sew sleeves to fronts and back.
Hood
- Knit 24 right cable stitches + 14 stitches from right side, pick-up and knit as many stitches from the sleeve cap as you need to to make sure there are no holes (remember how many stitches you added, these will be decreased in the next few rows), knit 41 stitches from back, pick-up and knit stitches from the other sleeve, and knit 14 stitches + 24 cable stitches from left side.
- Work a few rows continuing the cable patterns on each side and decreasing stitches over the sleeves by knitting 2 together for every stitch you picked up and knit in the previous step. You should have 117 stitches remaining including the cable stitches.
- On next row, work 2 centre stitches together so that you have an even number of stitches on your needle.
- Place marker between two centre stitches.
- Increase 1 stitch on either side of your central marker on every right side row, 10 times (136 stitches).
- Continue even until hood measures 8 inches, ending at centre market.
- Fold in half and graft top of hood closed following instructions in magazine to graft cable in pattern.
Button loops
- Using the smallest double point needles you own (I used size 0) knit a 3 stitch I-cord for 26 rows and cast-off for each button loop. I made 3.
- Fold I-cord loops and sew to sweater.
- Add buttons on other side.
- Ta-da! A Cardigan for Merry!

Let me know if you make one...and if any of the instructions were unclear so I can make chagnes as necessary ;0)
Cheers!






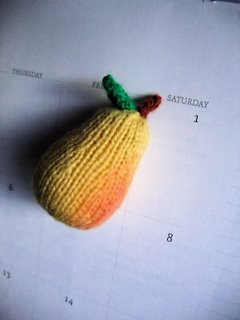 So I started knitting an advent calendar. Actually I started it on Saturday but caught up today! Now that I'll be spending a lot of time at home, I think I can totally knit all 24 ornaments by Christmas. It'll help me pass (and mark) the time in December. Then I'll only have another 2 and a half months to go ;0)




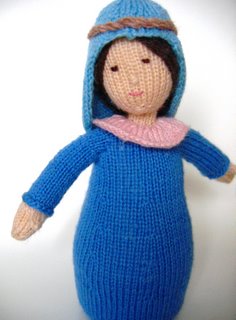 All that's left to do is colour on some cheeks with a red pencil crayon. (I kid you not, that is actually what it says in the pattern.) I figured I'd knit up a test swatch to practice colouring cheeks on. I've come too far to mess it up with improvised craft cosmetics! LOL!
  Oh, and Julian loves her too. When I started to put her together, he would come over and ask to see her and then ever so gently pet her while exclaiming "nice nice" and since I finished her last night, he can't help but exclaim "wow" everytime he sees her. I feel that I've done right by Mary and also by my son. Somehow, I've managed to pass on my admiration for needlecraft to my toddler...and it makes me very proud ;0)
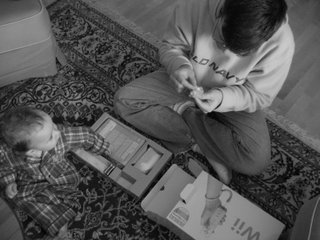
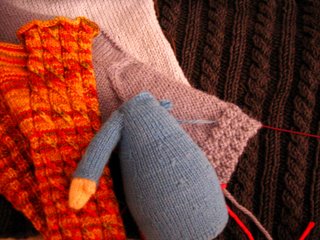 But now that I am waking from my first trimester hibernation, I suddenly feel the need to knit EVERYTHING. I think I've developed knitting attention deficit disorder and hope I can somehow manage to turn it around. Oh, and if that wasn't bad enough, I can't stop buying yarn! Seriously, this knitter is out of control!